How to Get Twinkle Lights to Show Up in Your Cakesmash Photos

Struggling to get twinkle lights to show up in your photos? Learn how to create beautiful bokeh using aperture, distance, and focal length, but in plain English so it makes sense! Austin cakesmash photography tips for photographers.
bo·keh | \ ˈbō-kā , -kə \
Definition of bokeh as defined by Merriam-Webster
: the blurred quality or effect seen in the out-of-focus portion of a photograph taken with a narrow depth of field.
How to Get Twinkle Lights to Show Up in Your Cakesmash Photos
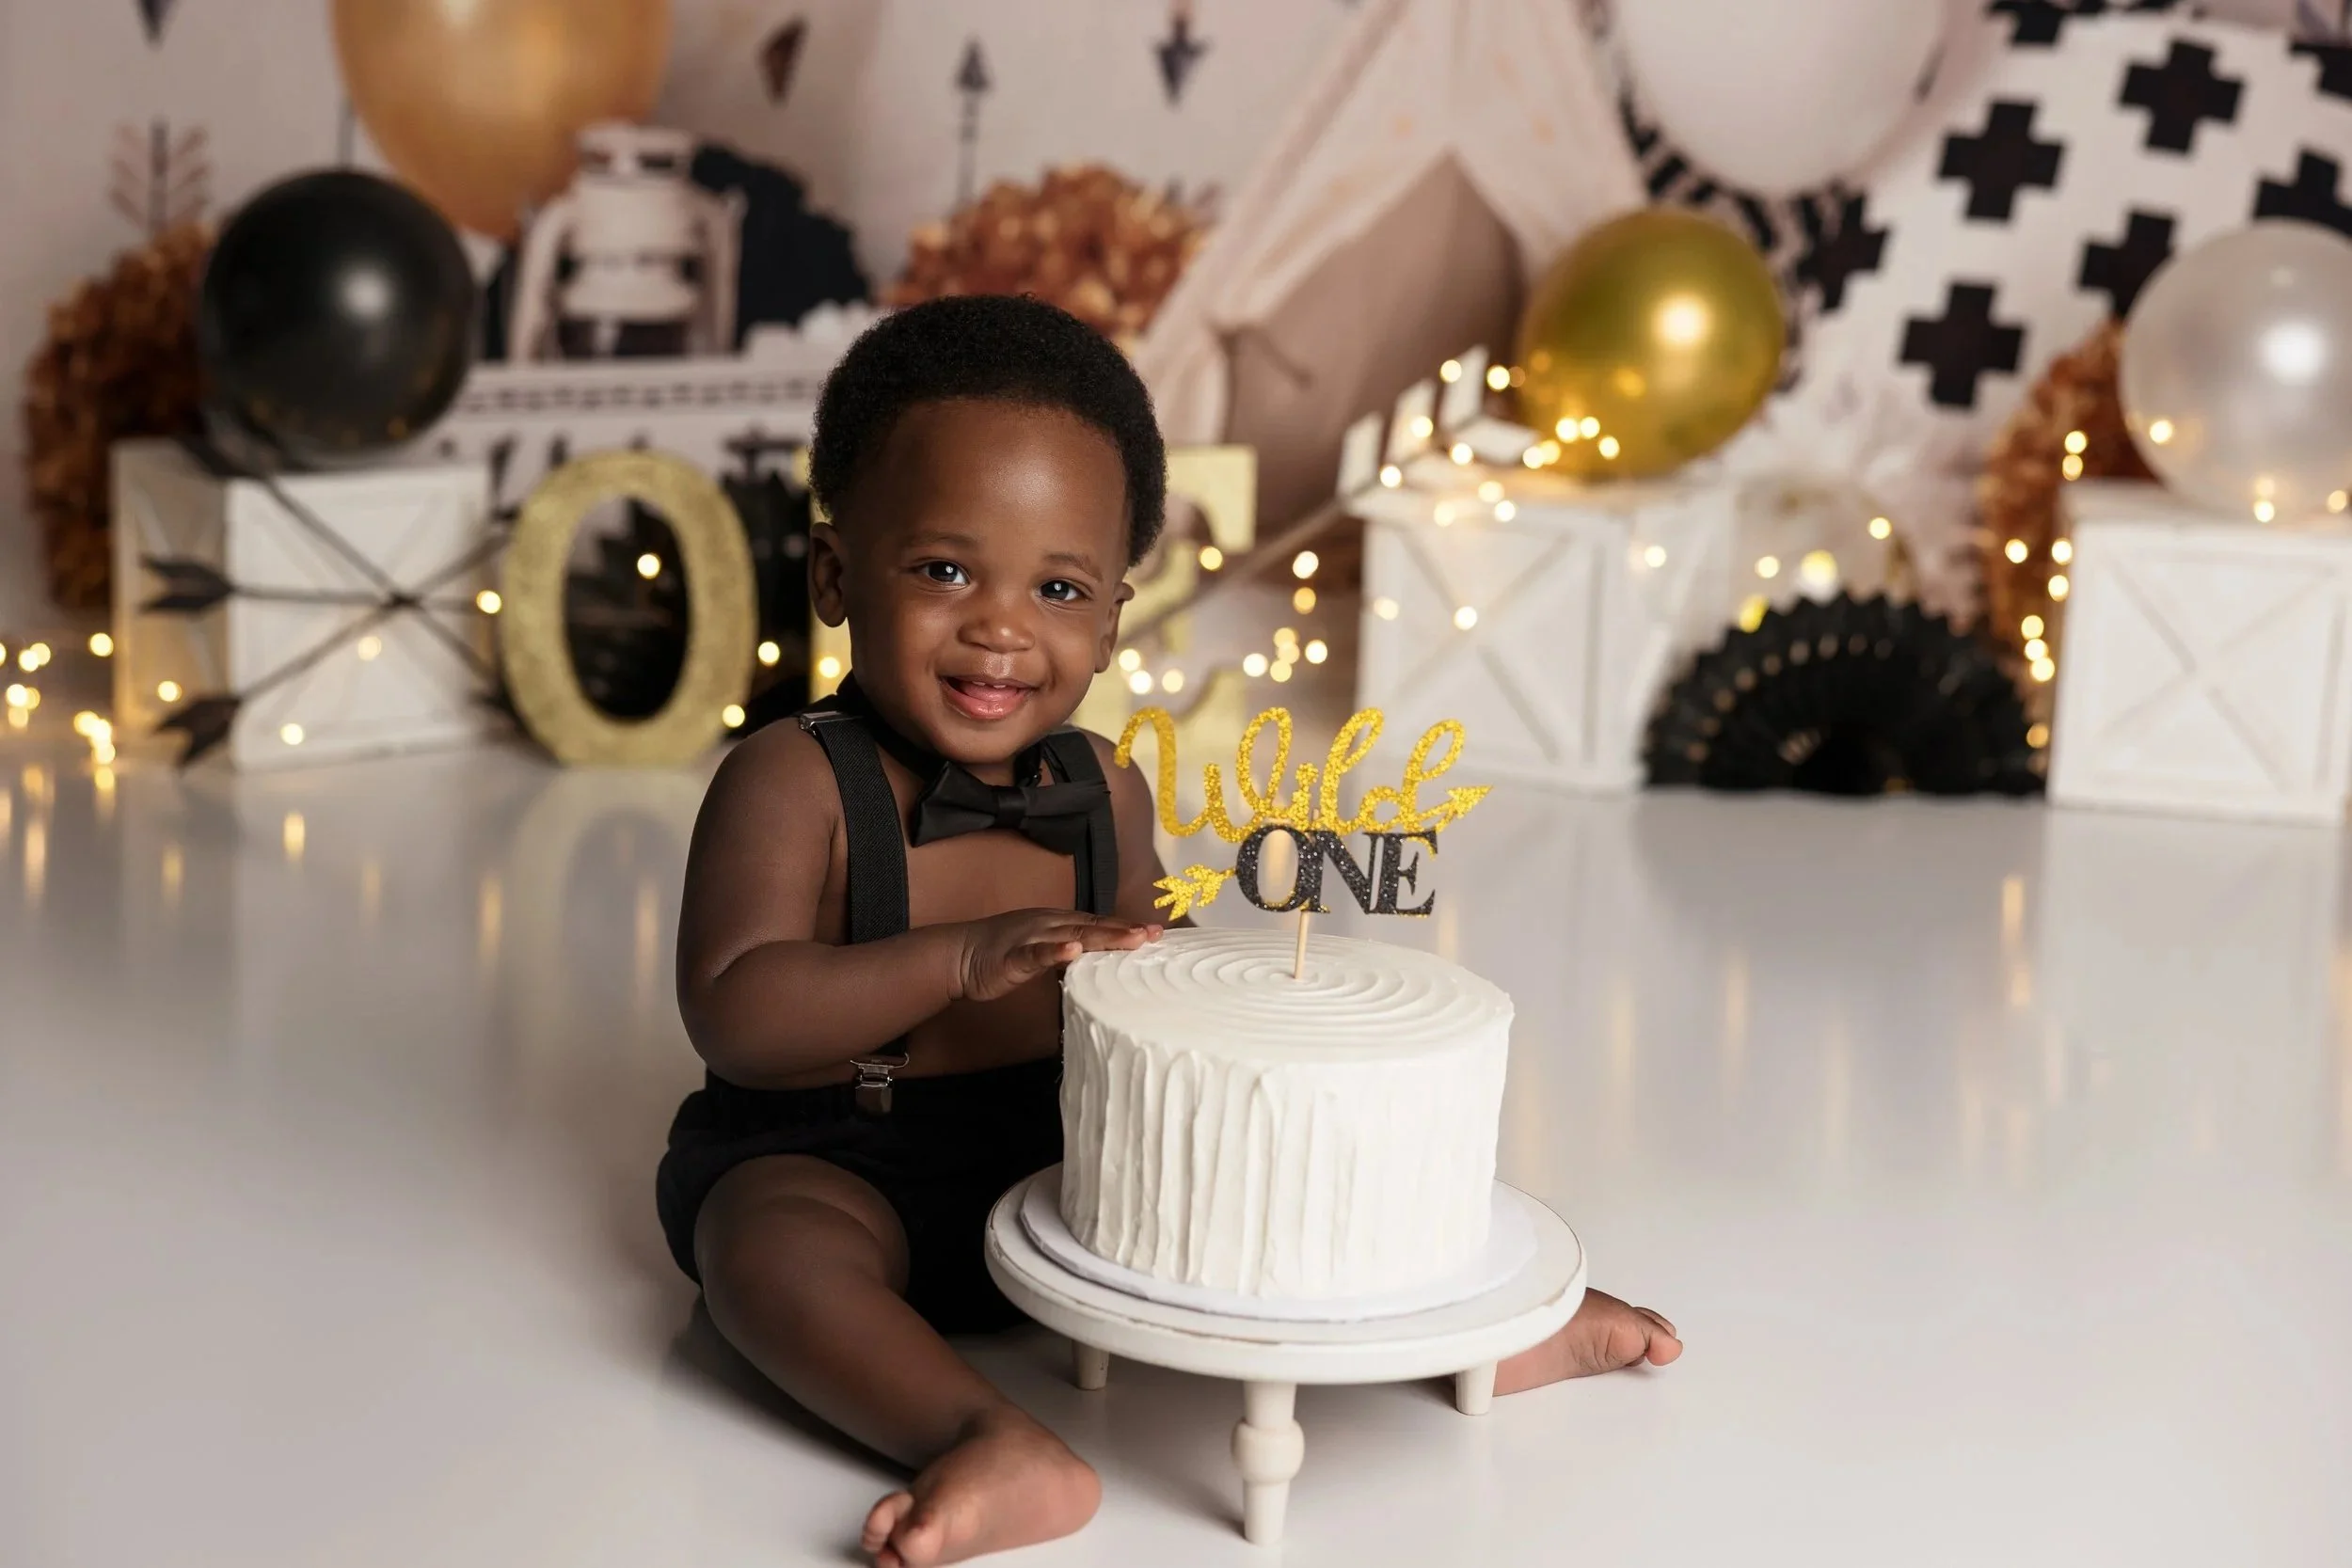
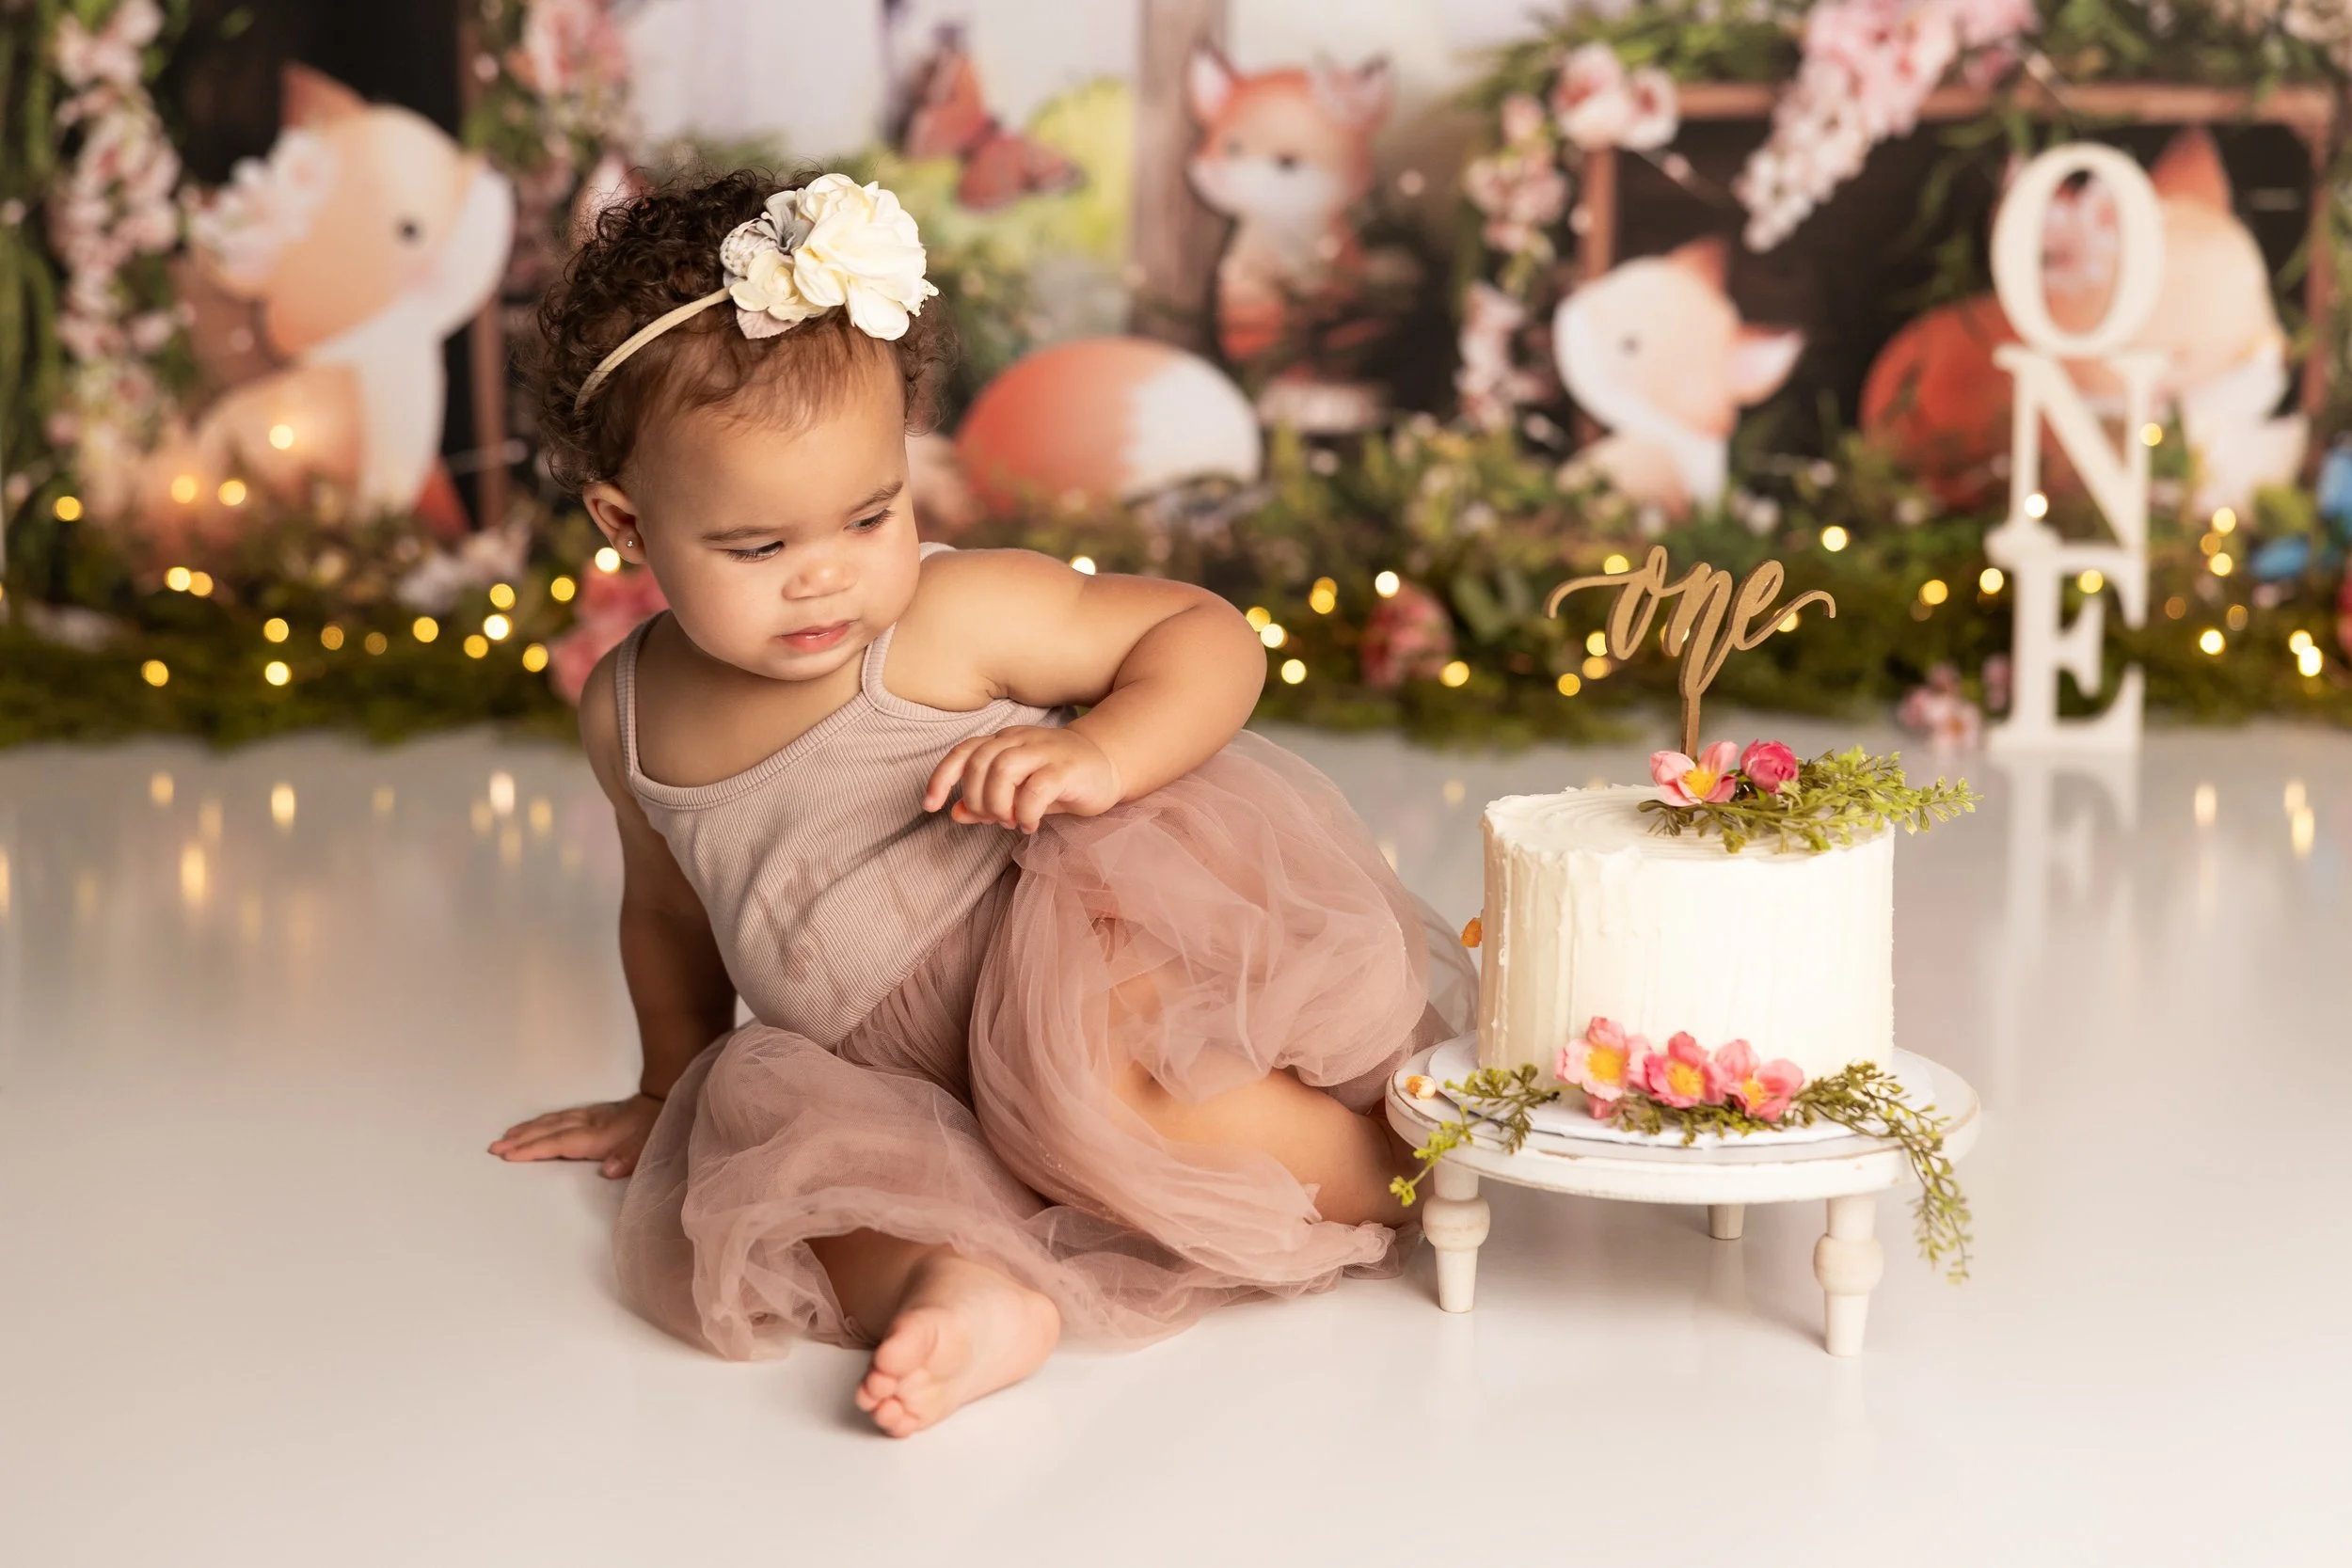
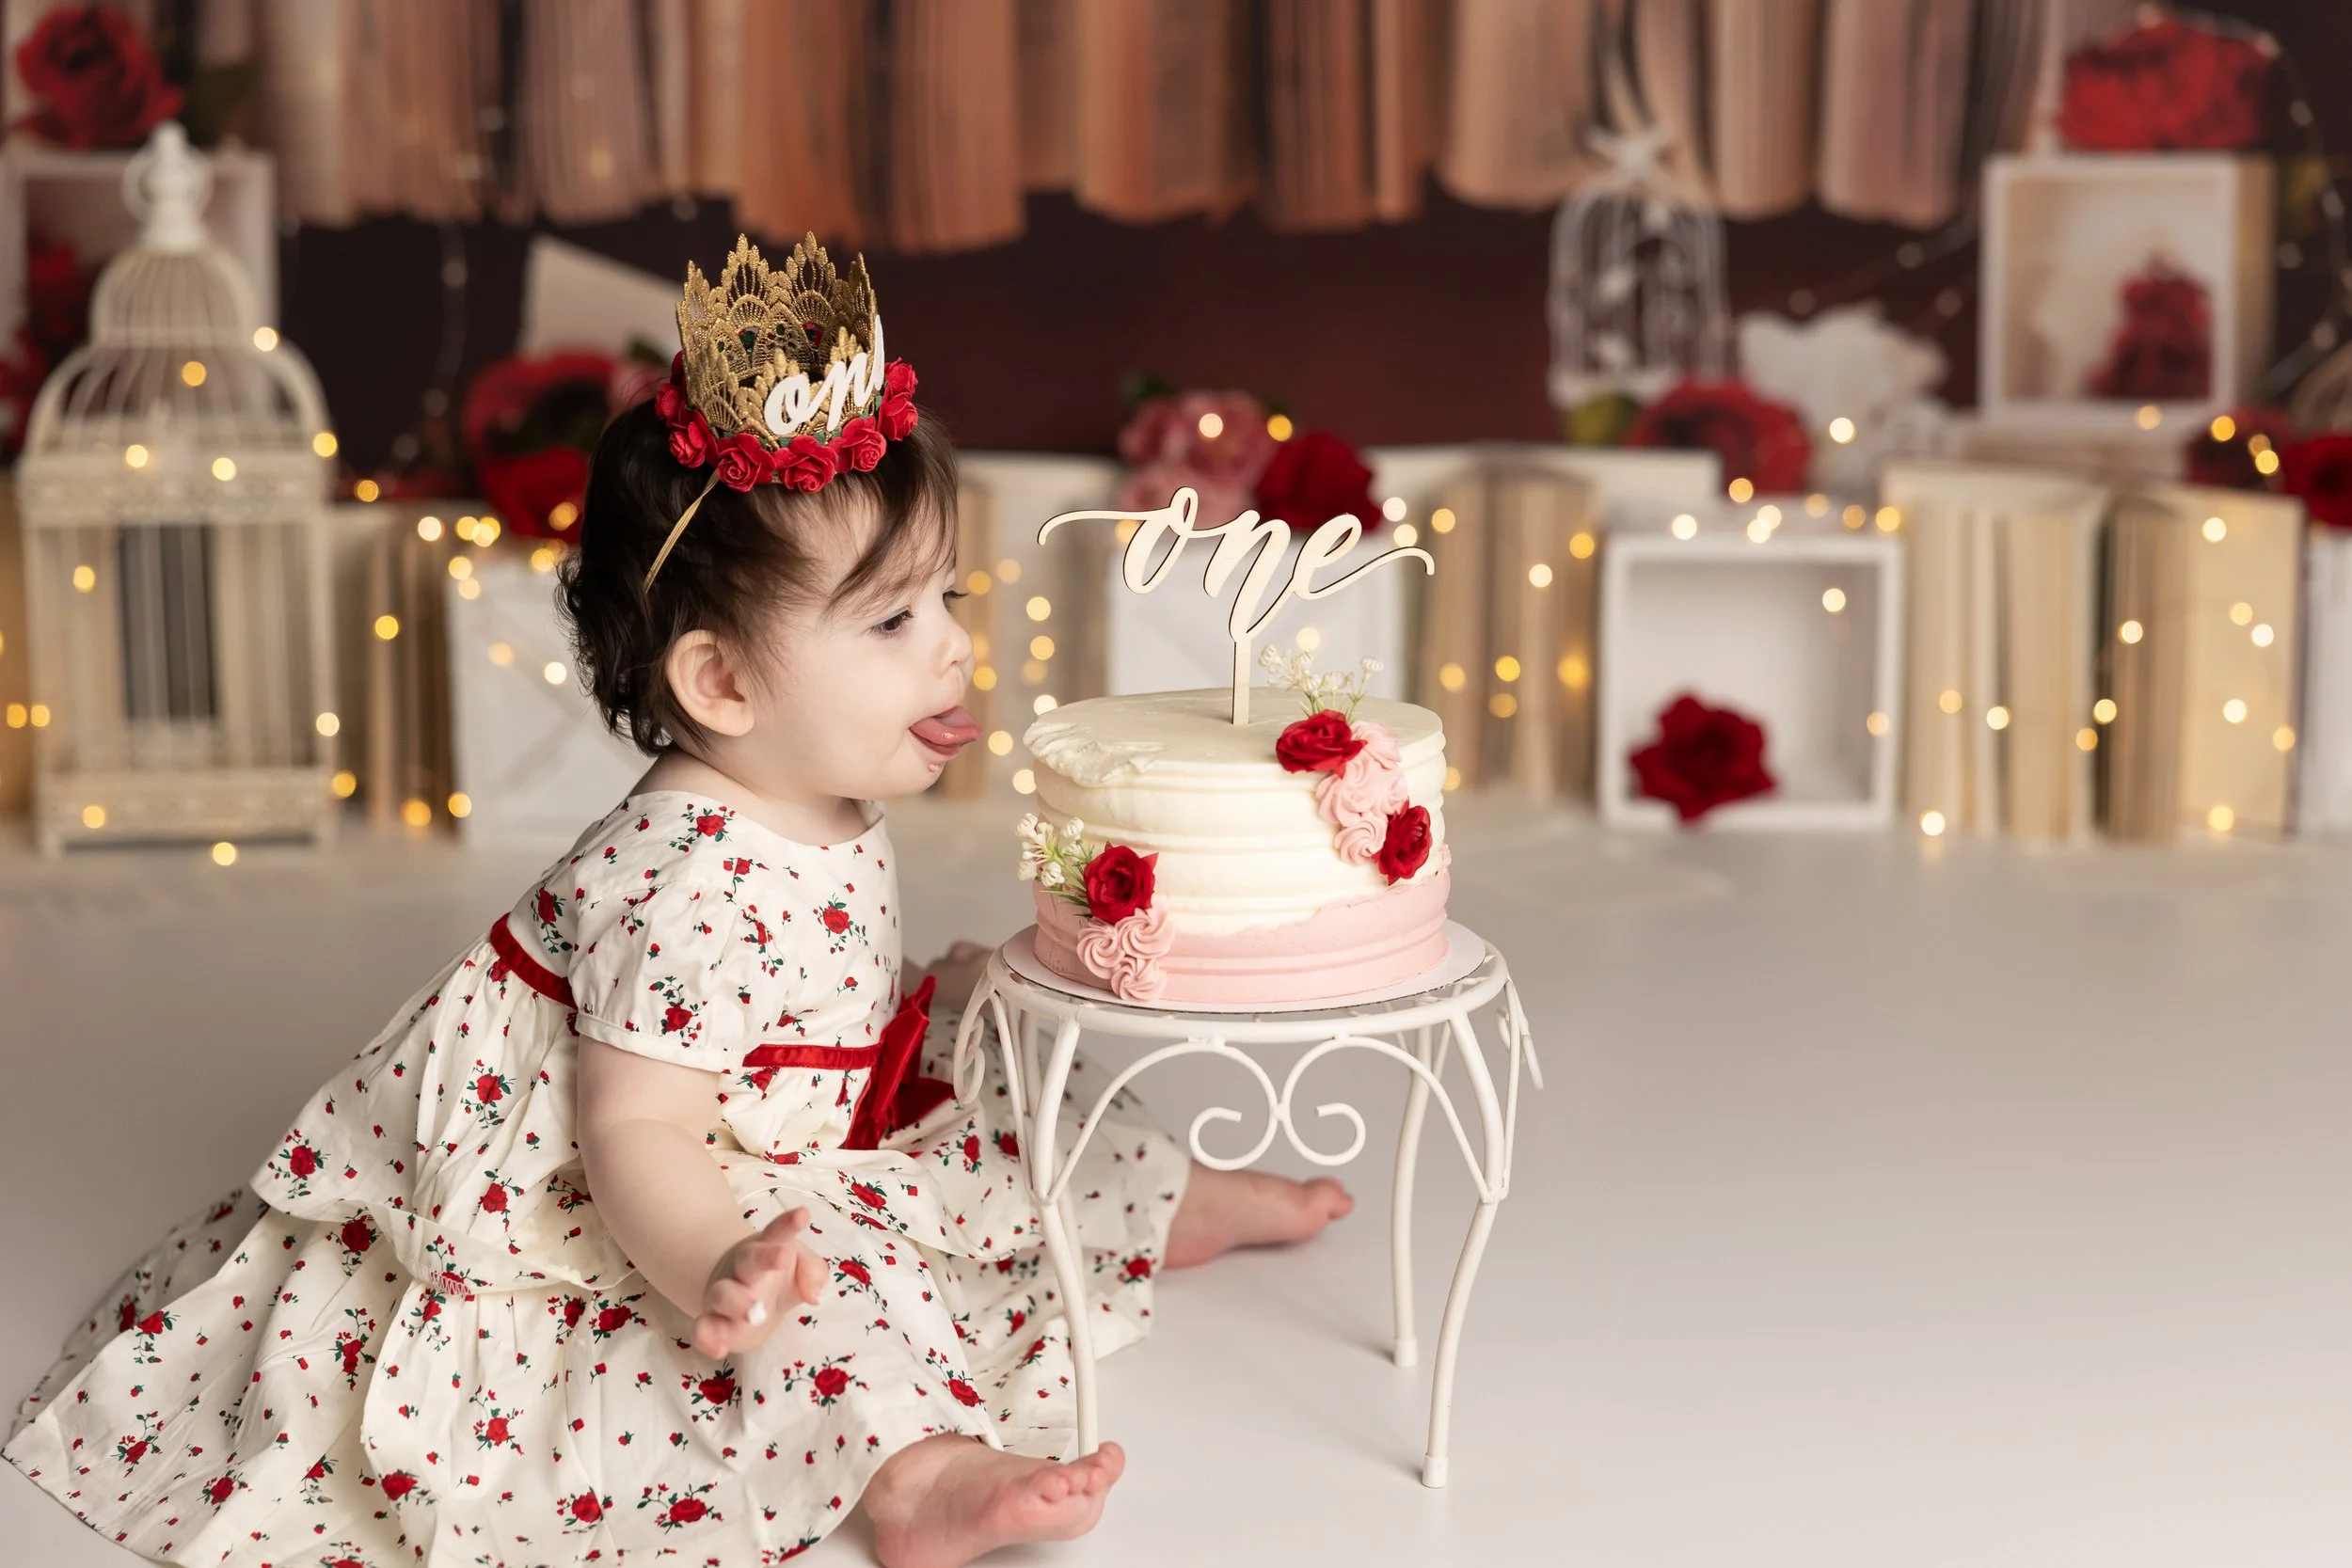
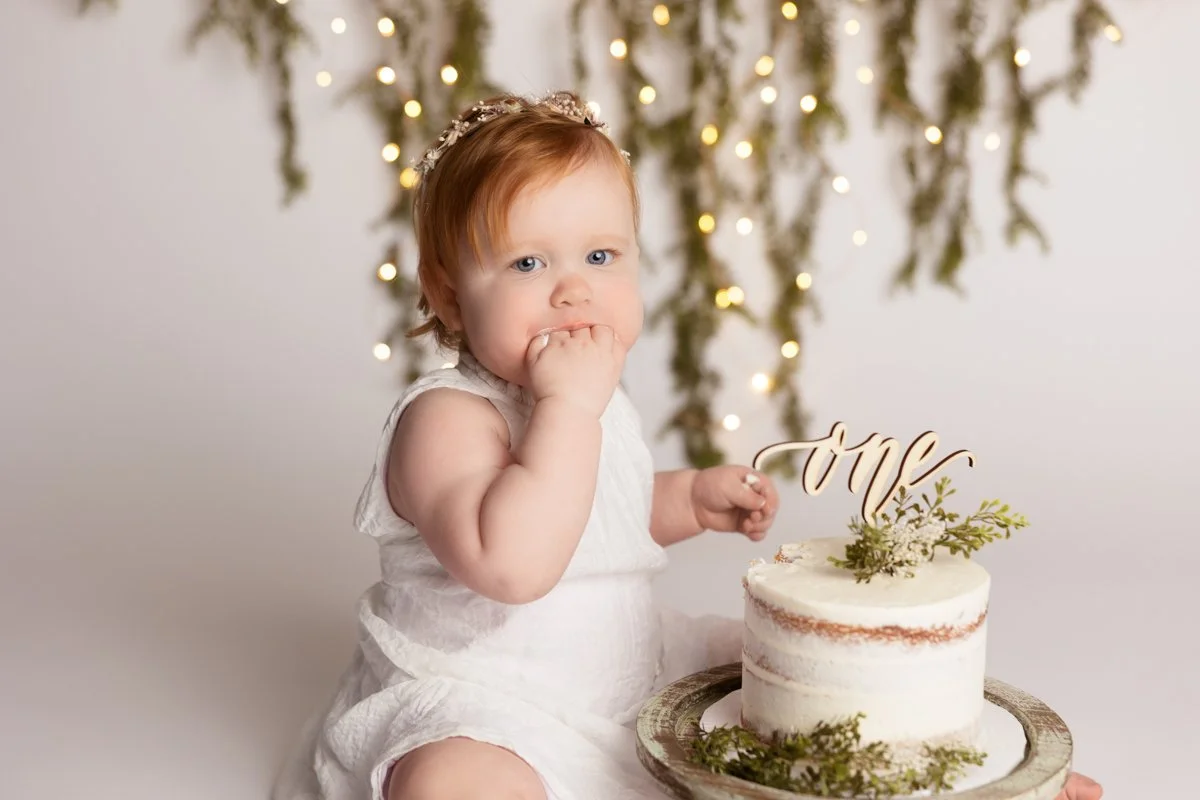
If you’ve ever set up the cutest cakesmash backdrop with twinkle lights… and then they completely disappear in your photos, you’re not alone. This is one of the most common frustrations I hear from newer photographers. The good news? It’s not your lights. It’s just a few simple settings and setup tweaks. Once you understand how aperture, distance, and focal length work together, you can get that soft, glowy bokeh effect every time.
What You Need
Twinkle Lights - I use simple LED copper wire (fairy) lights, usually one strand is plenty for an 86” backdrop.
Pro tip: wrap them up carefully when you’re done unless you enjoy untangling chaos later. 😅
Lighting
I typically use studio lighting (Einstein + 64” PLM), but this works with natural light, continuous light, or any soft consistent light source.
Camera + Lens
I shoot on a Canon R6 with a 28–70mm lens. Ideally f/2.8 or wider is easiest but f/4.0–f/5.6 can still work (you just need more space).
The 3 Things That Actually Matter (This is where everything clicks!)
1. Aperture (your most important setting)
If you want strong bokeh, you need a wide aperture.
Newborn sessions: I love f/2.0
Cakesmash sessions: usually f/2.8–f/4.0
Why the difference?
Because babies move. A slightly higher aperture gives you a better chance of keeping them in focus.
All of the example images in this post were shot at:
f/2.8
1/200 shutter
ISO adjusted as needed
2. Distance Between Baby and Background
This is the biggest mistake I see. If your baby is too close to the backdrop, your lights will NOT blur.
You want:
At least ~3 feet between baby and lights
More distance = bigger, softer bokeh
If your space is tight (hi, same 🙋🏻♀️), just do the best you can, but even small adjustments help.
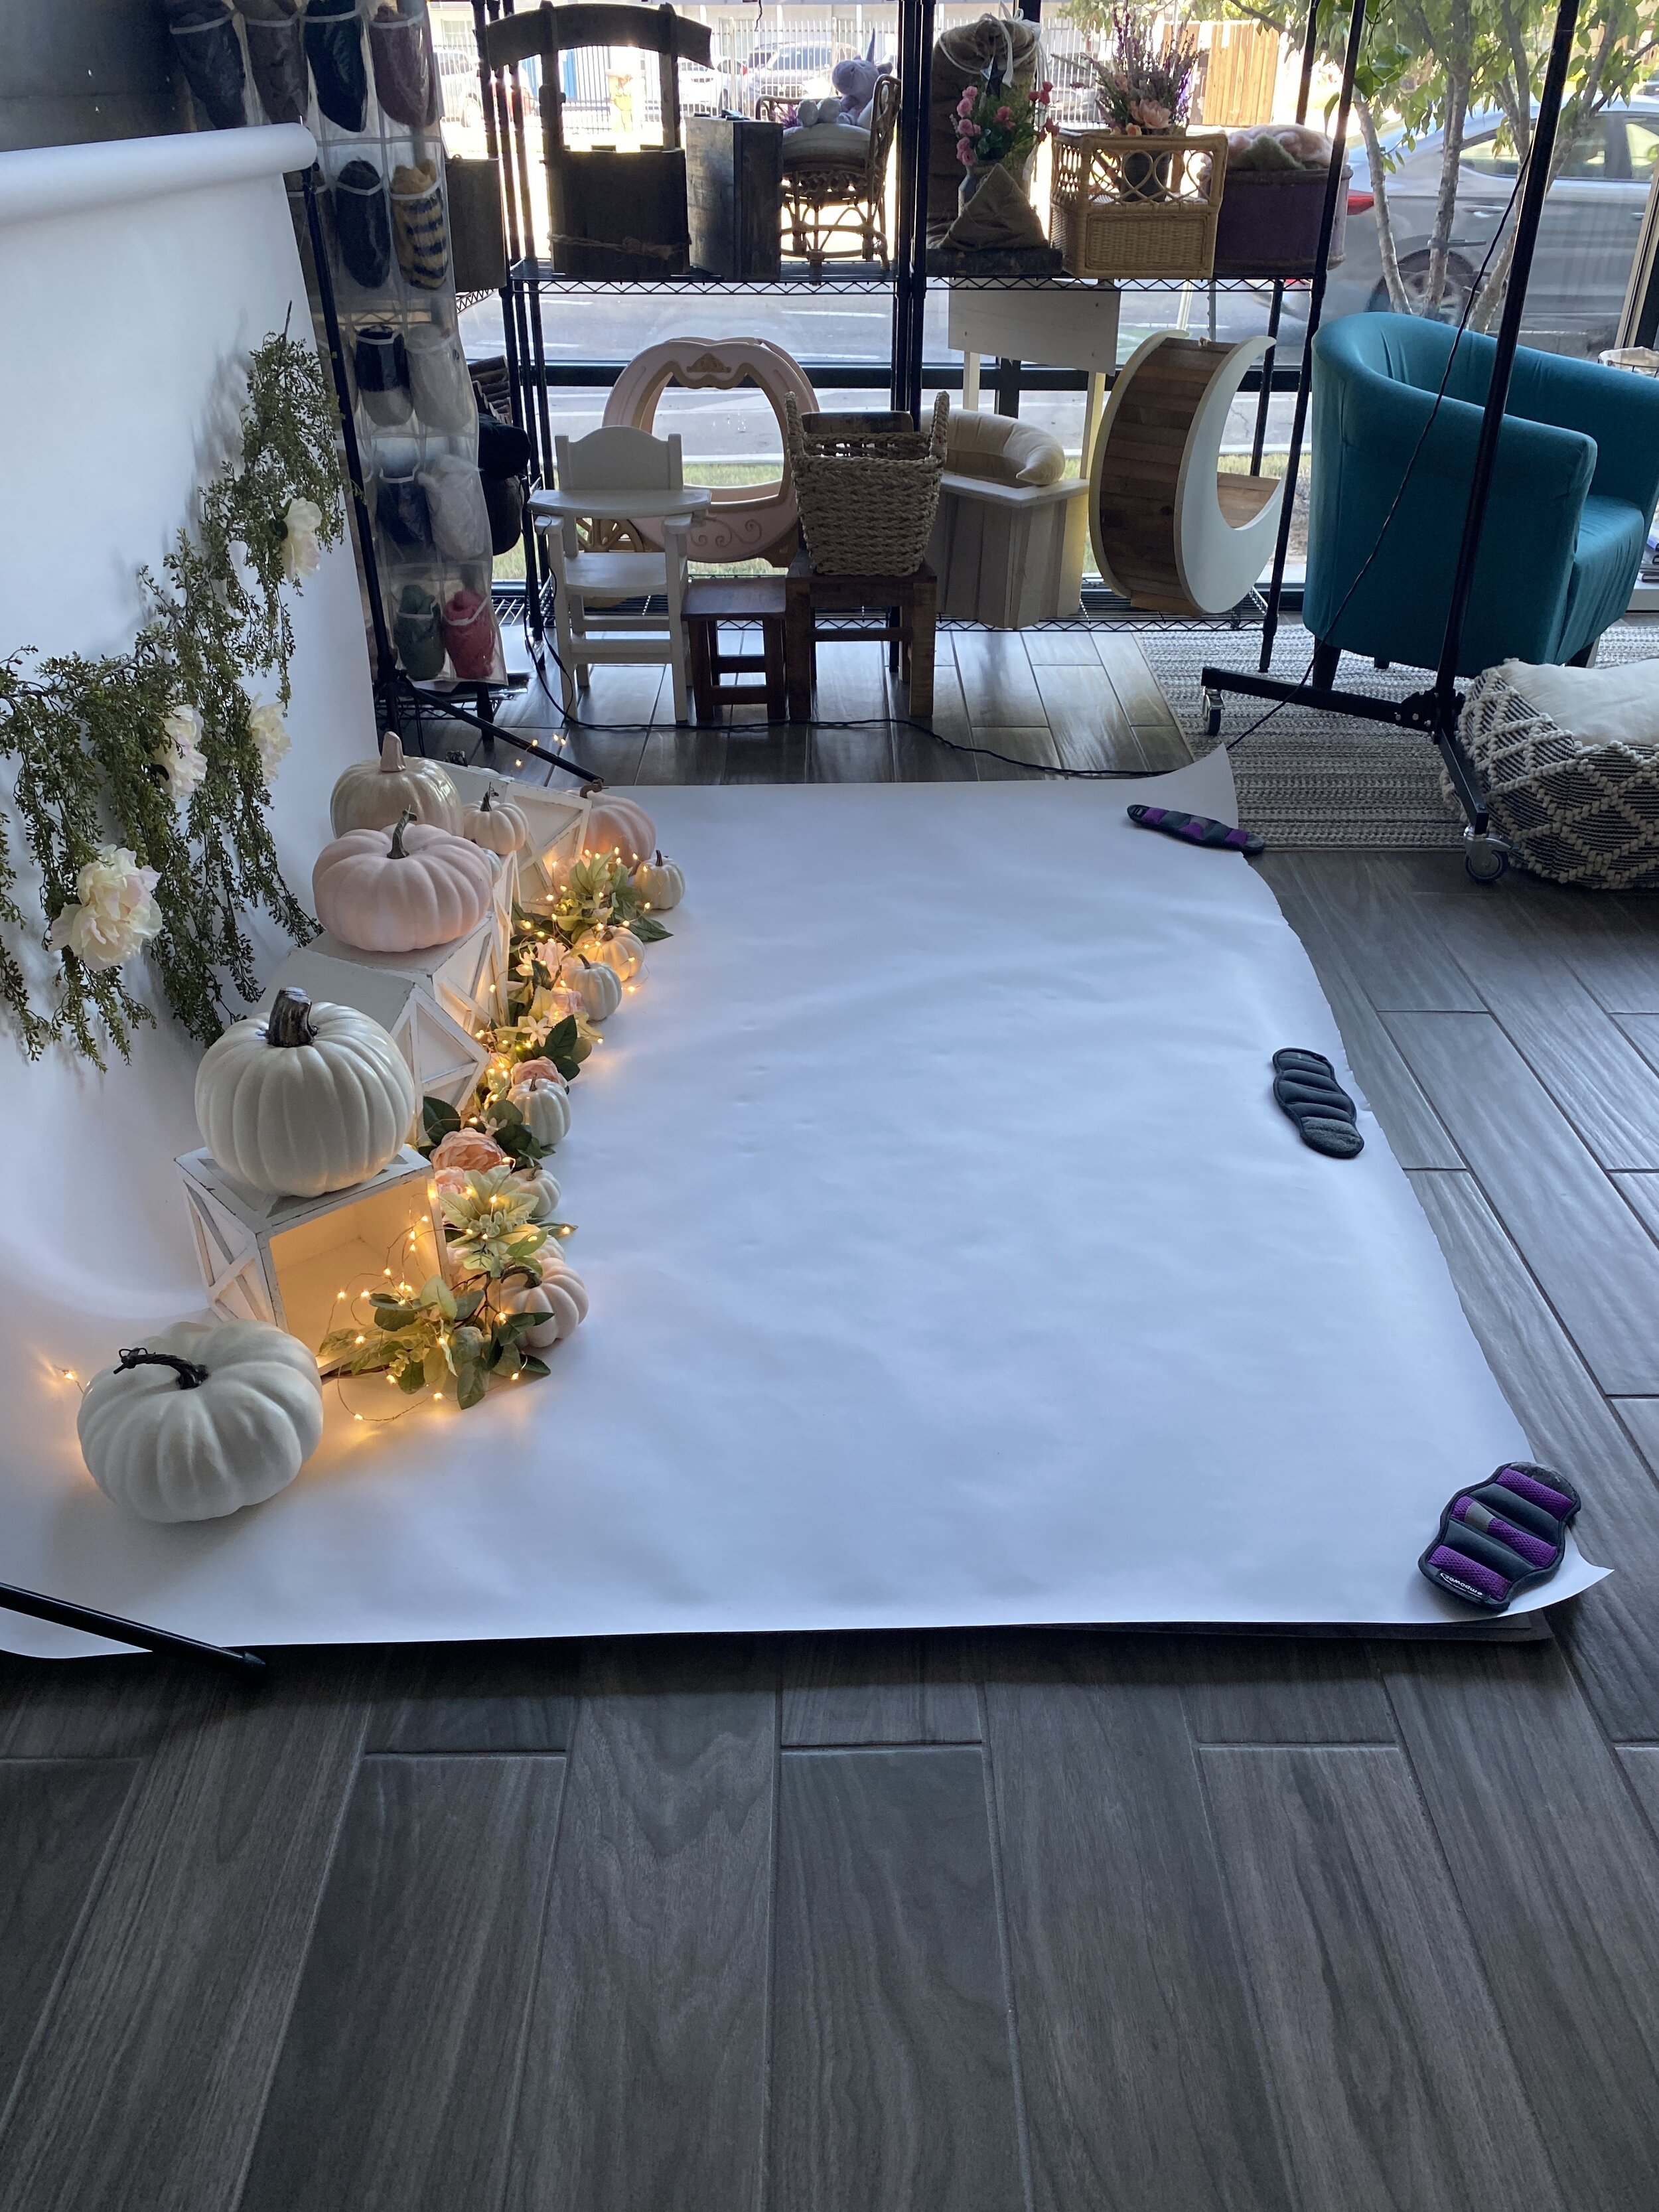
This image was shot with my cell phone in natural light. The paper backdrop is 86” wide and there’s about 5’ rolled out on the floor. The baby will sit halfway between the lights and the edge of the paper.
3. Focal Length (this is your secret weapon)
This is what a lot of photographers miss:
Zoomed out (35–40mm): lights look smaller
Zoomed in (70mm+): lights look bigger and softer
You don’t have to move your feet, you can literally change the look just by zooming. If you have an 85mm lens, even better.


Real Example: Same Setup, Different Look
These two images were taken:
From the same spot
With the same settings
Same distance from the baby
The only difference? Focal length.
And suddenly your twinkle lights go from subtle… to ✨magic✨.
If You Don’t Have a “Fast” Lens
You can still make this work. If you’re shooting at f/4.0 or f/5.6 you can:
Increase the distance between baby and background
Zoom in more (which means you have to back up more from the baby, which I have a hard time doing in my tiny studio.
You’re basically compensating with space and compression instead of aperture.
TL;DR (Save This Part!)
Get some twinkle lights
Keep your baby at least ~3 feet from the background
Use the widest aperture you can (ideally f/2.8)
Zoom in (70mm+ if possible)
That’s it. That’s the whole trick.
Final Thoughts
Once you understand this, it becomes second nature and you’ll start designing your sets differently on purpose. Twinkle lights are one of the easiest ways to elevate a cakesmash setup without adding a ton of props.
Want Help With This in Real Time?
If this still feels confusing or you want hands-on help dialing in your settings, I offer both in-person and virtual mentoring.
Or DM me on Instagram - I’m always happy to help troubleshoot.
~Jessica 💜
Join my Facebook group for live behind-the-scenes videos, tutorials, and chat about all things photography!