86” vs 64” PLM for Newborn Photography: Does Size Really Matter?
There are a ton of lighting options available for portrait photography but after a bit of research it seems many professional newborn photographers prefer the 86” PLM from Paul C Buff. Those who use the PLMs tend to differ when it comes to choosing a white or silver lining, whether they ‘shoot through’ the PLM or ‘bounce back’ off the PLM, and if they are using one or two diffusers, but we aren’t going to get into those variables today. We are just going to compare sizes.
When I started out I used the 64” PLM because I traveled to people’s home with my equipment so it was much easier to transport and I worked in really confined spaces so the 86” was just out of the question. Then when I got a studio and had more space and didn’t need to break it down every day I switched to the 86” because I heard it was ‘better’. Whether that’s true or not, we’re about to find out. Before we start I would like to add there is no right or wrong lighting to use. As long as you know how to manipulate the light you have, you will be able to get images you love, whether it’s natural light, strobe, continuous light, and whatever multitude of modifiers there are. I just chose these because A) it’s what I have and B) they do seem to be the most popular choices in newborn photography.
So I was happily using my 86” PLM for about 2 years but a few weeks ago I accidentally knocked over my lightstand and snapped the bar on the PLM. In a pinch I needed to pull out my 64” so I could keep working. I ordered a new 86” but, since I wasn’t really noticing a huge difference in the lighting I ended up sticking with the 64” mainly because it took up much less space in the studio. But the thought that many think the 86” is ‘better’ kept nagging at me. So today I ended up with some spare time in the studio and decided to do a little experiment and compare the two to determine if there really is a difference. I tried to set it up like a true experiment without switching any other variables (hello 8th grade science, it’s been awhile 😝).
For my set-up I use a 3’x3’ card table with many blanket layers to pose my babies. I have a metal wall that I can magnet the blanket to so I get a nice drop off in the background and don’t need to extend anything in Photoshop. My lightstand is a Manfrotto Column Stand with Sliding Arm, light is Einstein Flash Unit from Paul C Buff, and the umbrellas are 86” and 64” PLMs with silver lining and 1 diffusion panel, also from Paul C Buff, and I bounce the light off the back. Camera is Canon 5DMarkIV with a 35mm lens. Baby model is the Stand in Baby. Posing fabric is from Hello Little Props, and the romper and hat are from Verity Isabelle on Etsy. I think that’s everything!

Pull Back to Show Set-Up - Top row is the 86” PLM. Bottom row is the 64” PLM. In the first column, if you look at the top of the PLM you can see how much higher the 86” is. The 64” goes up to the top of my metal wall and the 86” goes over a foot higher!
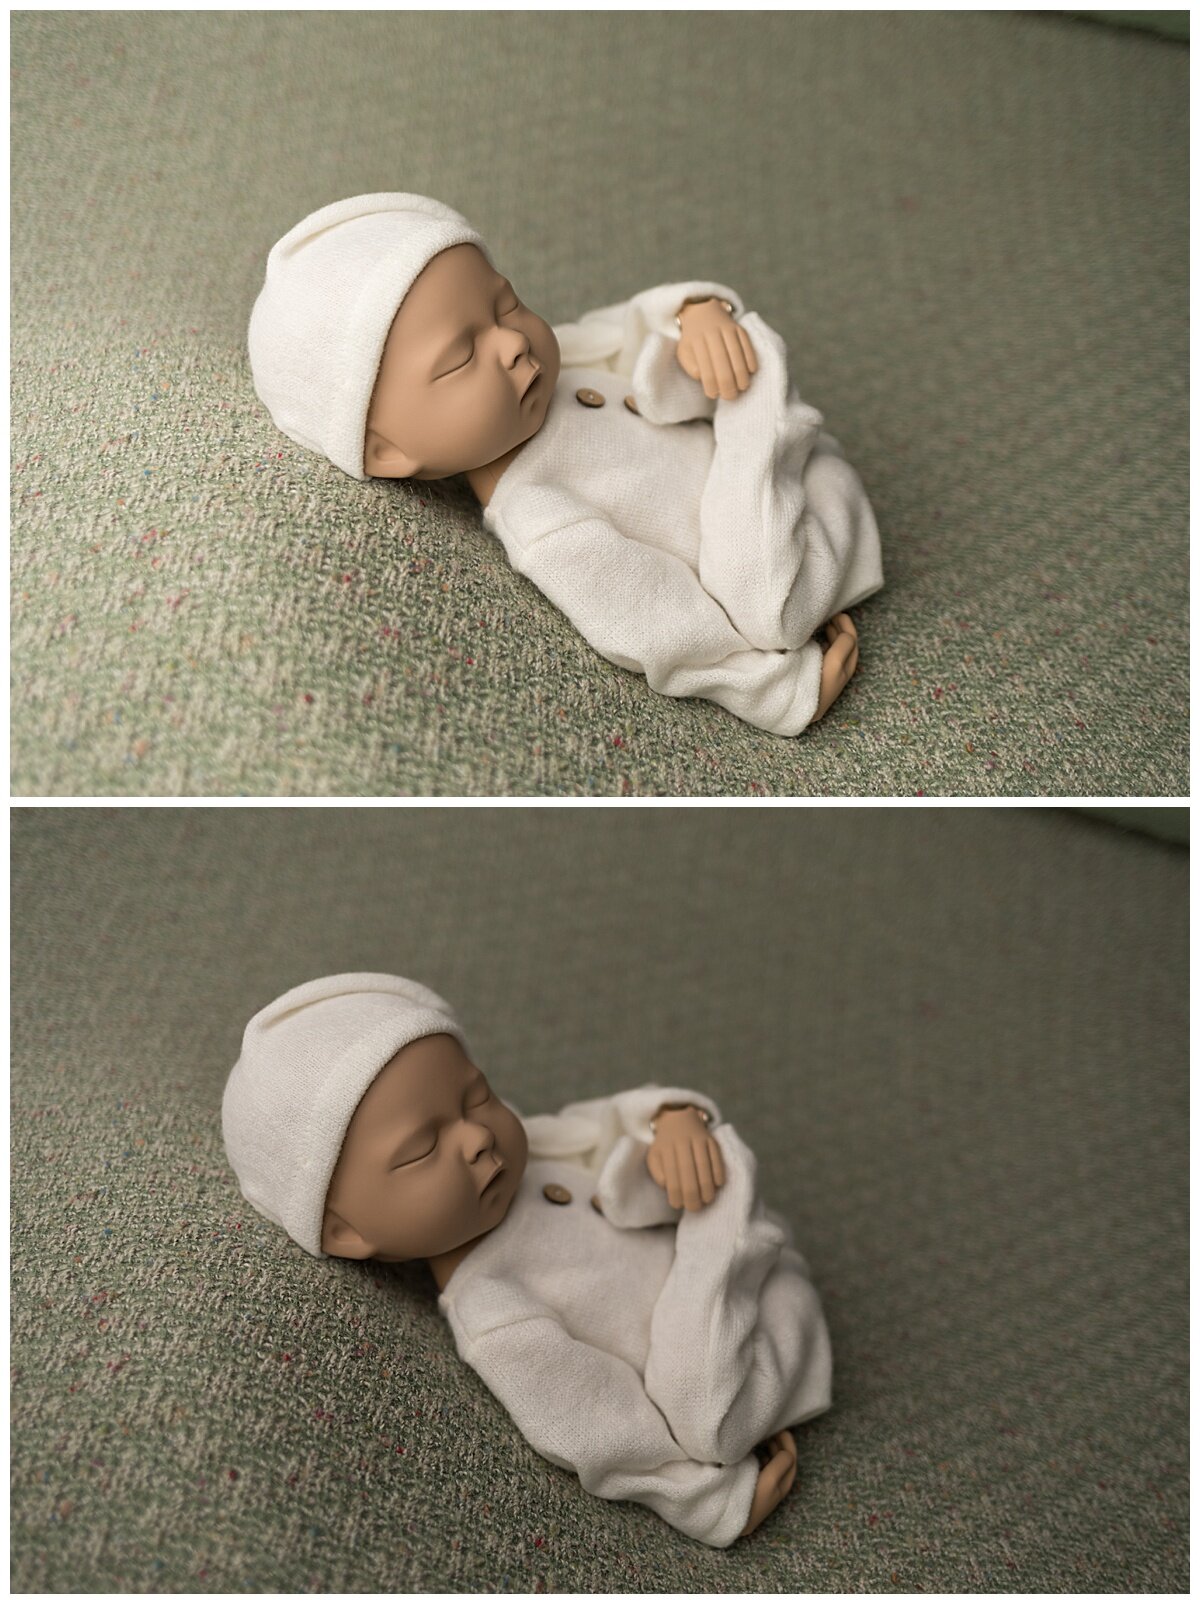
With each set up I had the light set up to the left of me, at about a 45° angle, with the bottom of the PLM lined up with the top of the baby’s head.

So for this first comparison shot you can see the 86” gives off a lot more light. I used the same exact setting for both shots. My first thoughts are that this can be overcome just by increasing the exposure when using the 64” either in camera or when editing. The 86” might actually be a bit too bright, especially if I was posing the baby on a white blanket and I would only be able to adjust the exposure when editing since my camera and light settings are as low as they can go. This is why you hear some photographers use 2 diffusers on the 86” - to help reduce hotspots and soften the light a bit more. So I took it a bit further and did some editing to compare the final images.
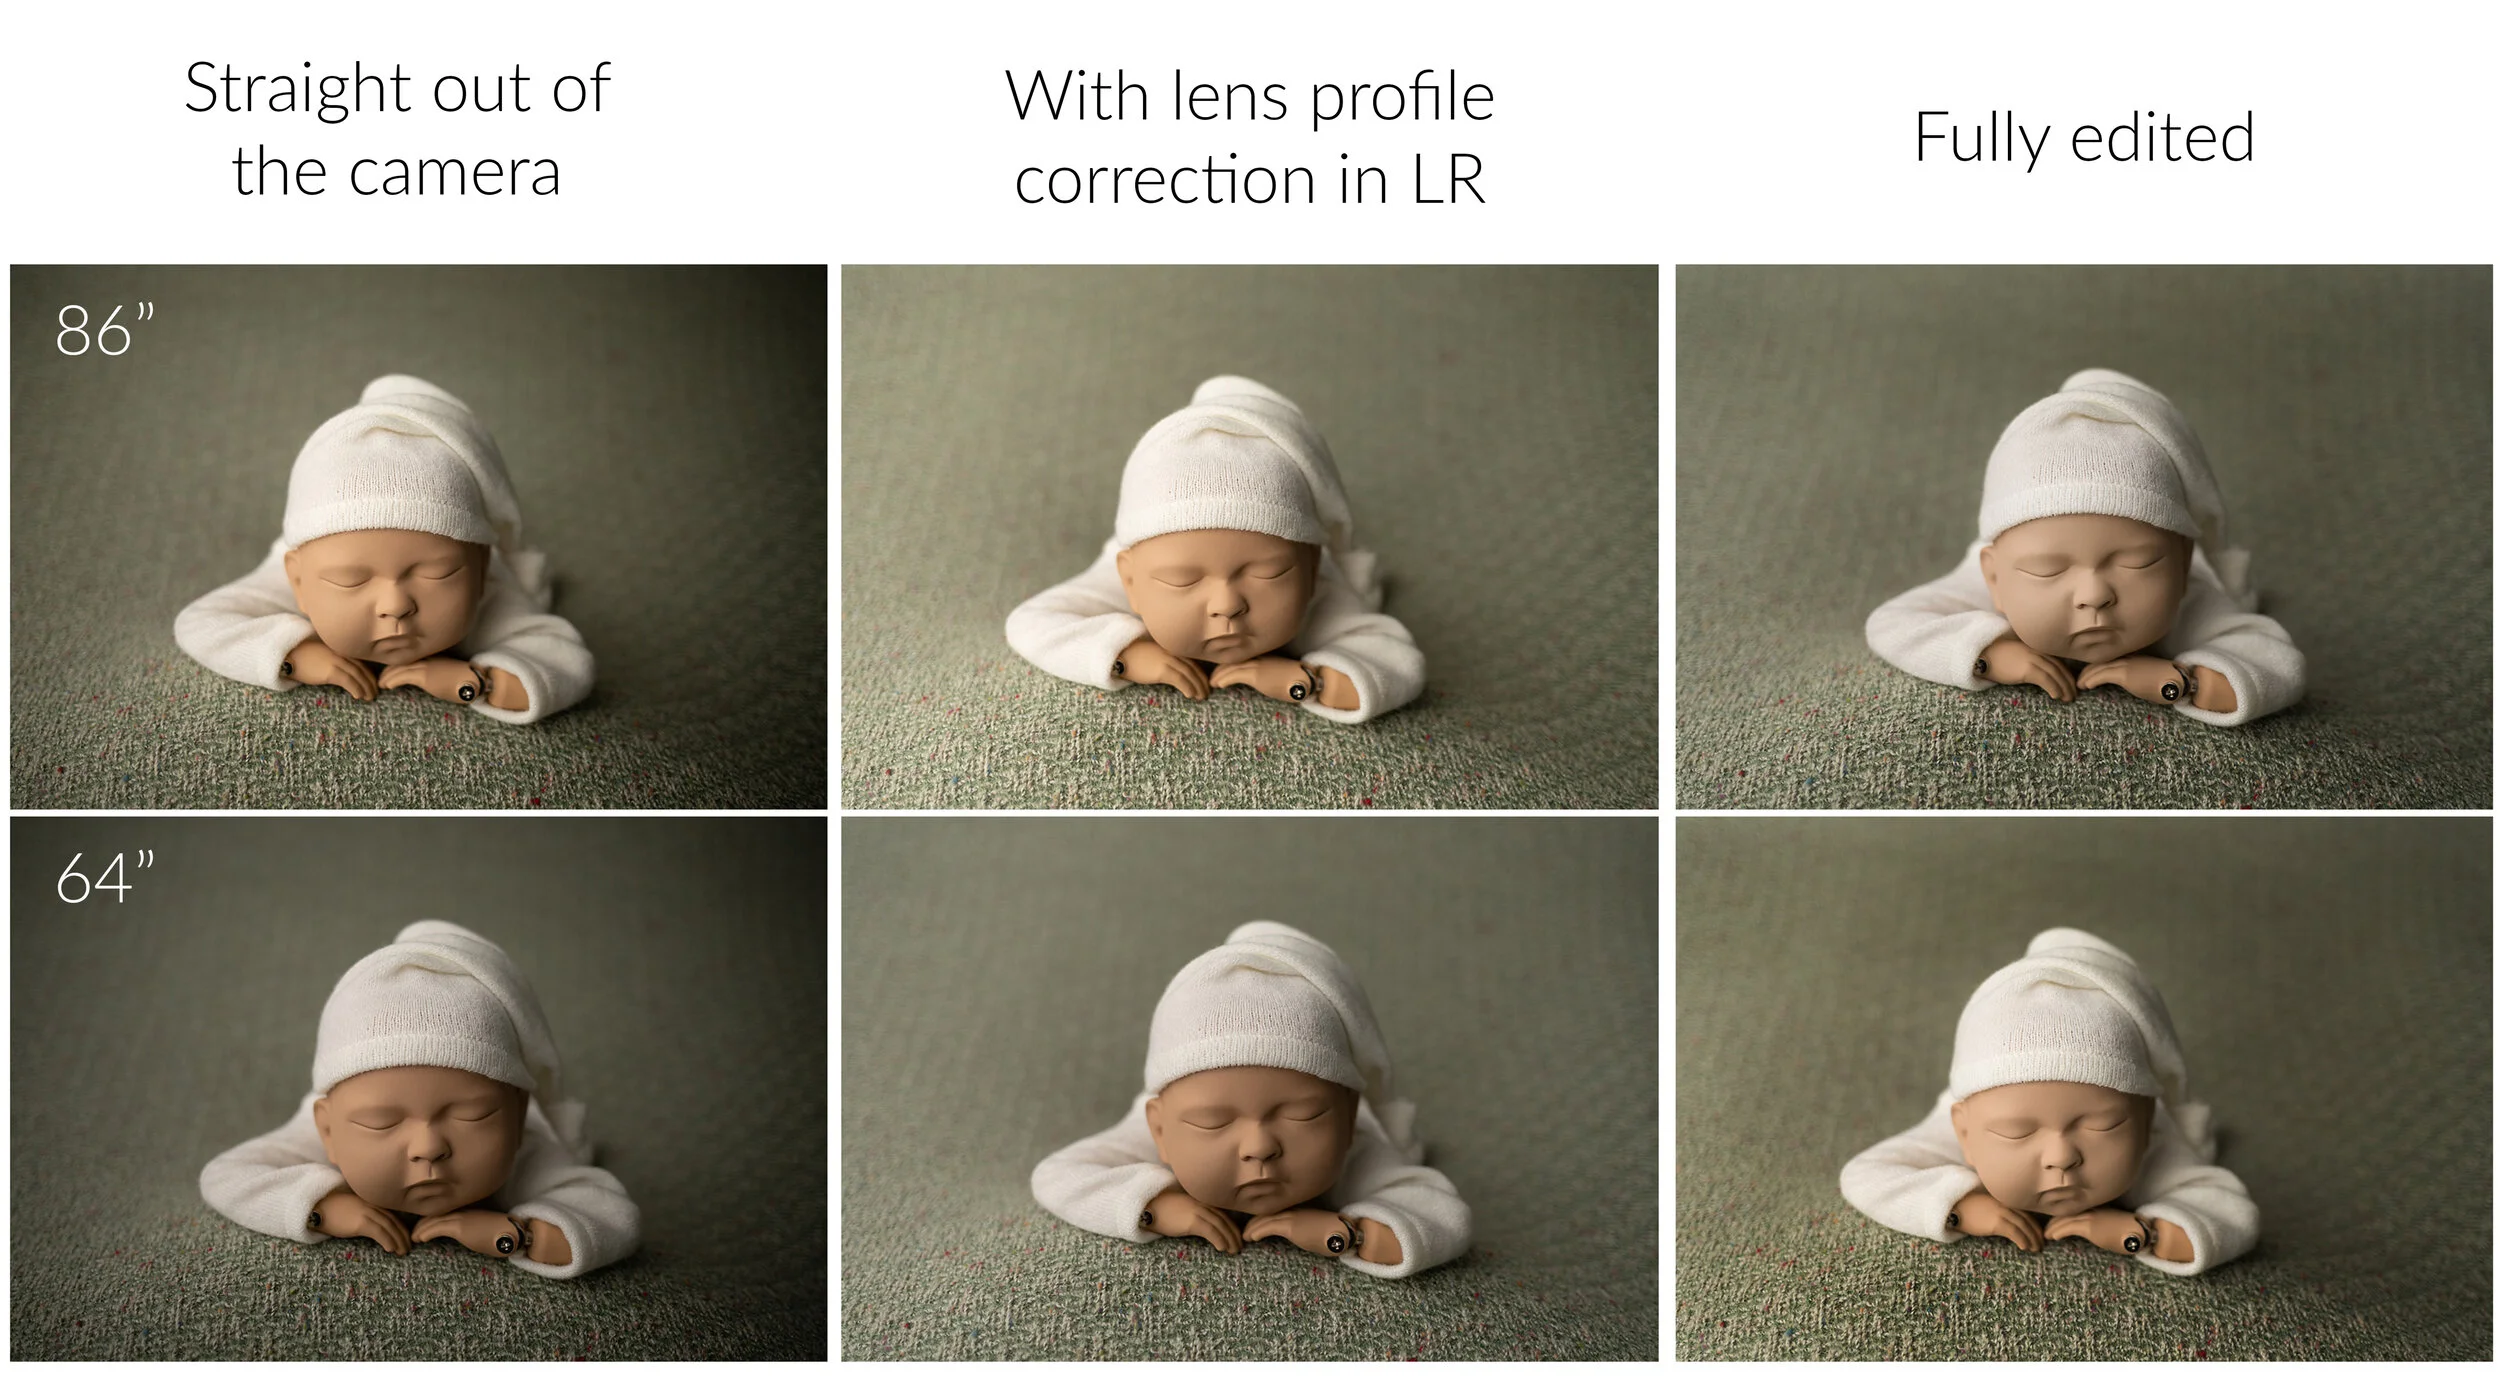
All I did to edit the images was some dodging and burning. On the 86” I burned the highlights a bit and on the 64” I dodged to add some brightness to the proper areas and burned to add a bit of vignette. Seeing a difference is a lot harder than I thought it would be! I think I actually prefer the 64” though. The lighting looks a bit flat on the 86” and I think I like a bit more contrast like on the 64”. Again, this could all be adjusted in editing, but I might as well get it closer to what I want in camera, right?
Let’s look at some other examples. These are all with lens profile correction only, no other editing. 86” on top, 64” on bottom.
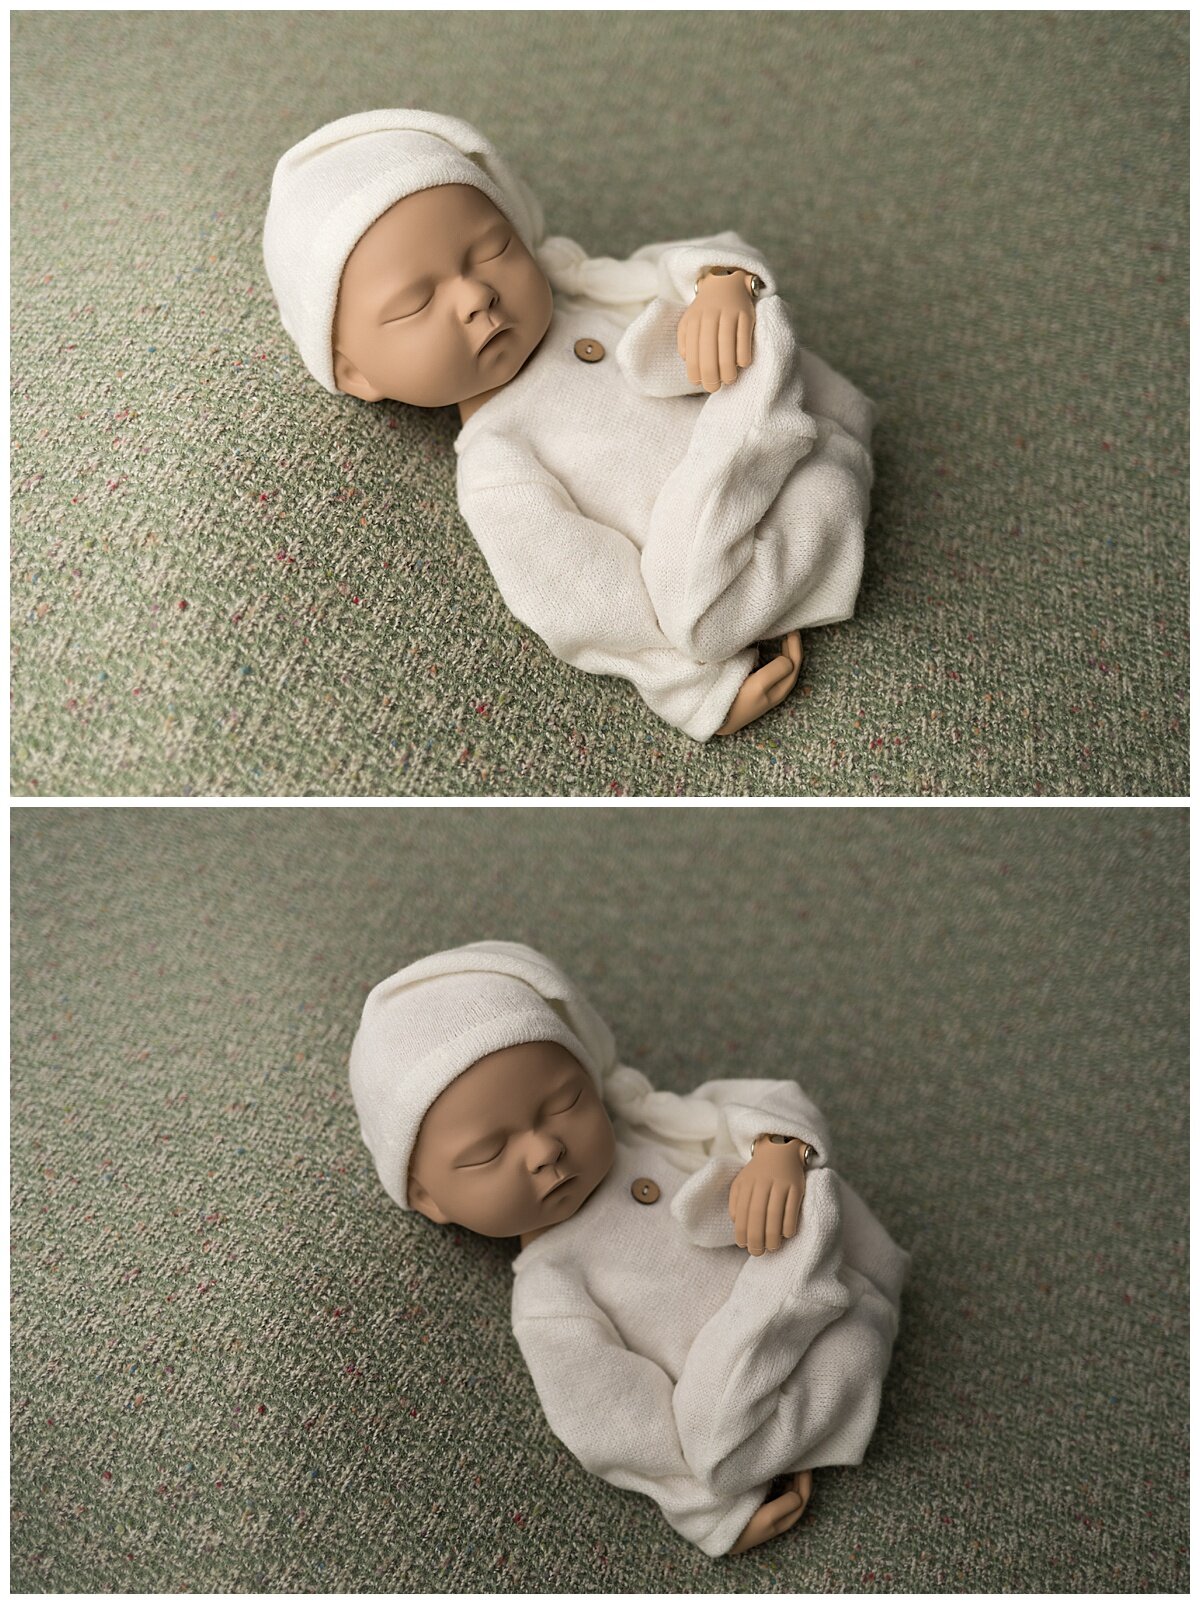
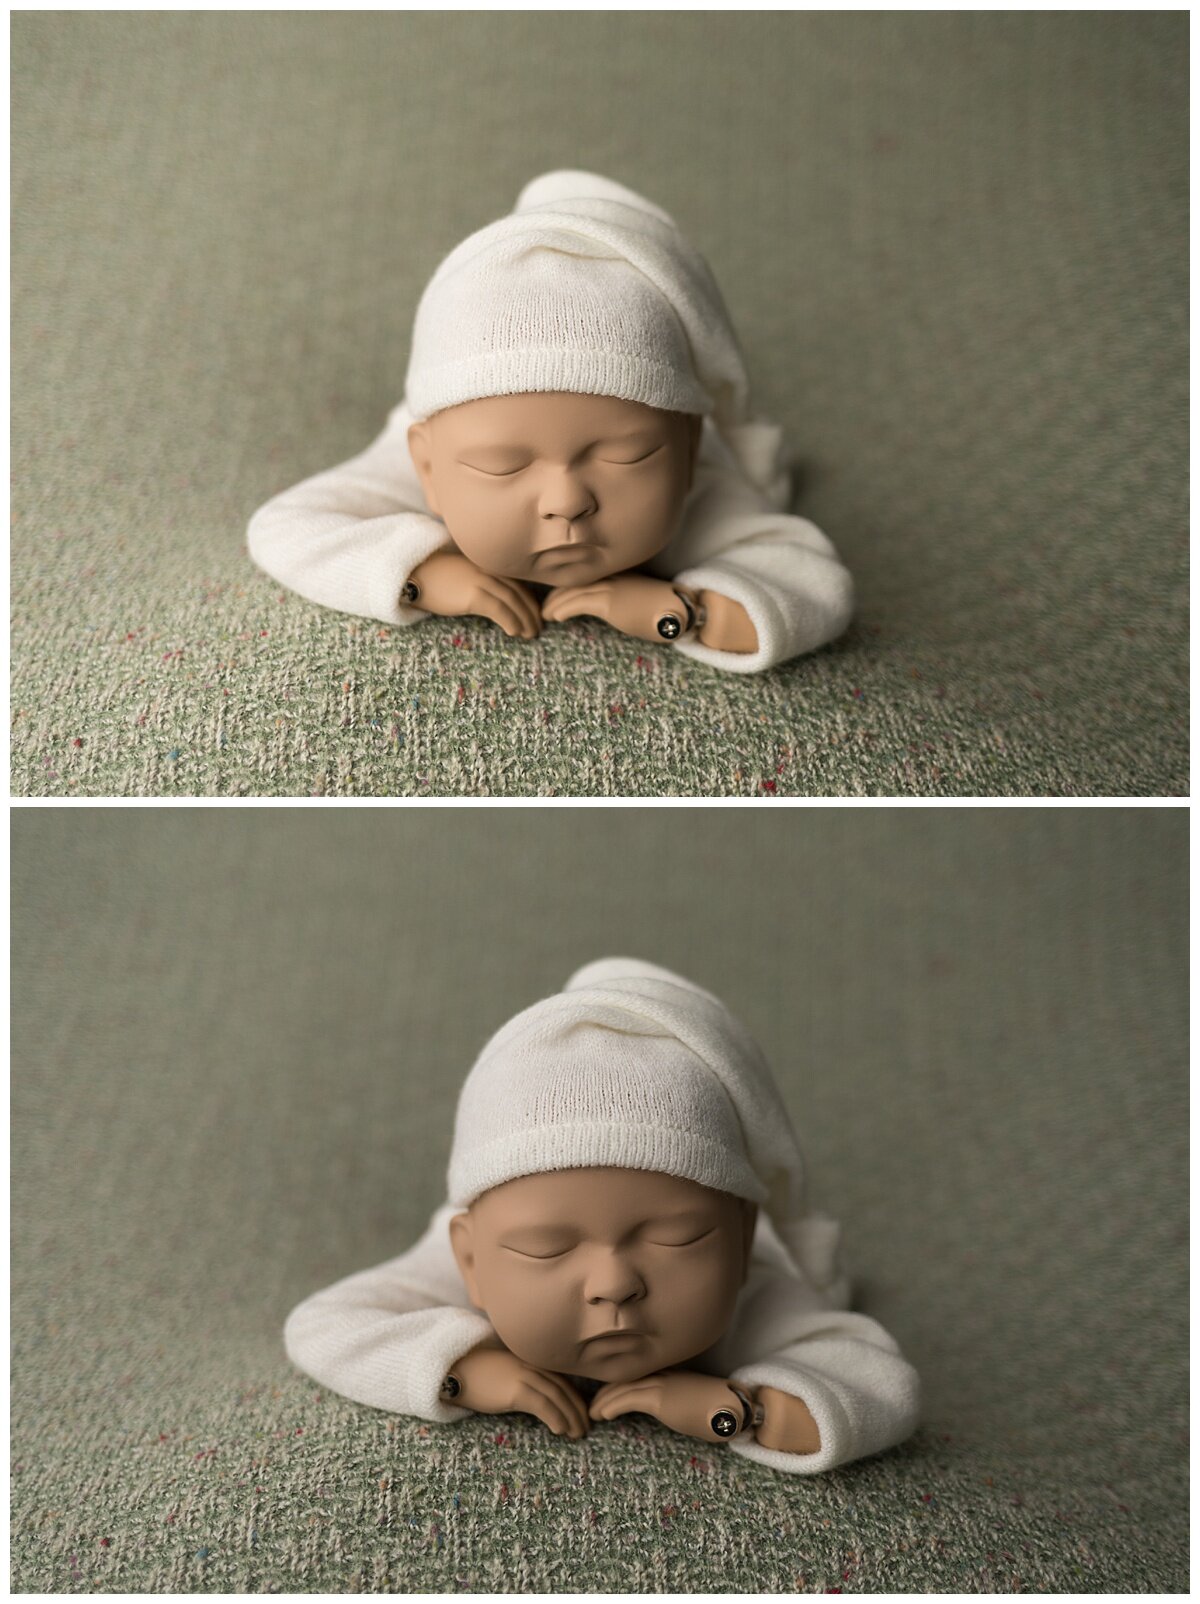
Straight out of the camera I’m drawn to the 86” just because it’s brighter. But in my final images I prefer more shadows and contrast. So, if I use the 86” I’ll need to do extra editing to add in those shadows and contrast. If I stick with the 64” I can just boost my exposure a bit in camera (I’ll raise my ISO between 125 and 200) or raise the intensity of the light and/or adjust the angle of the light and bring it more forward.
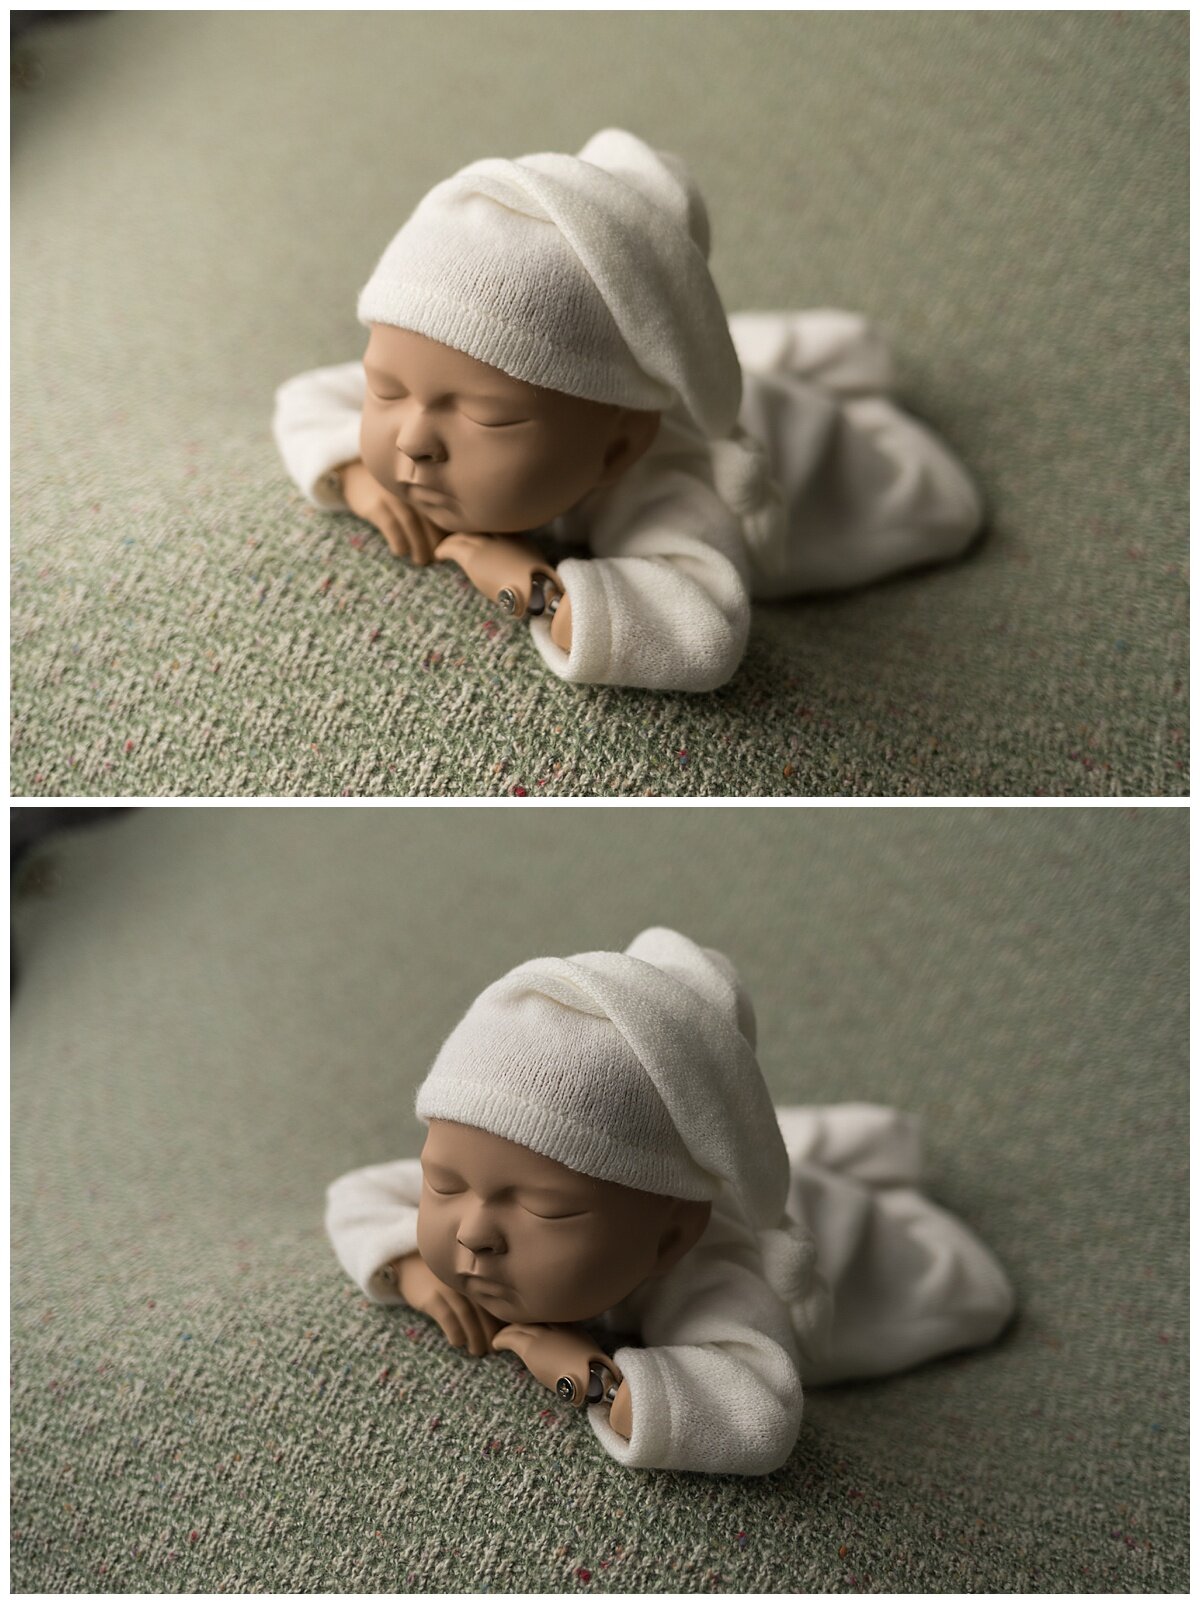
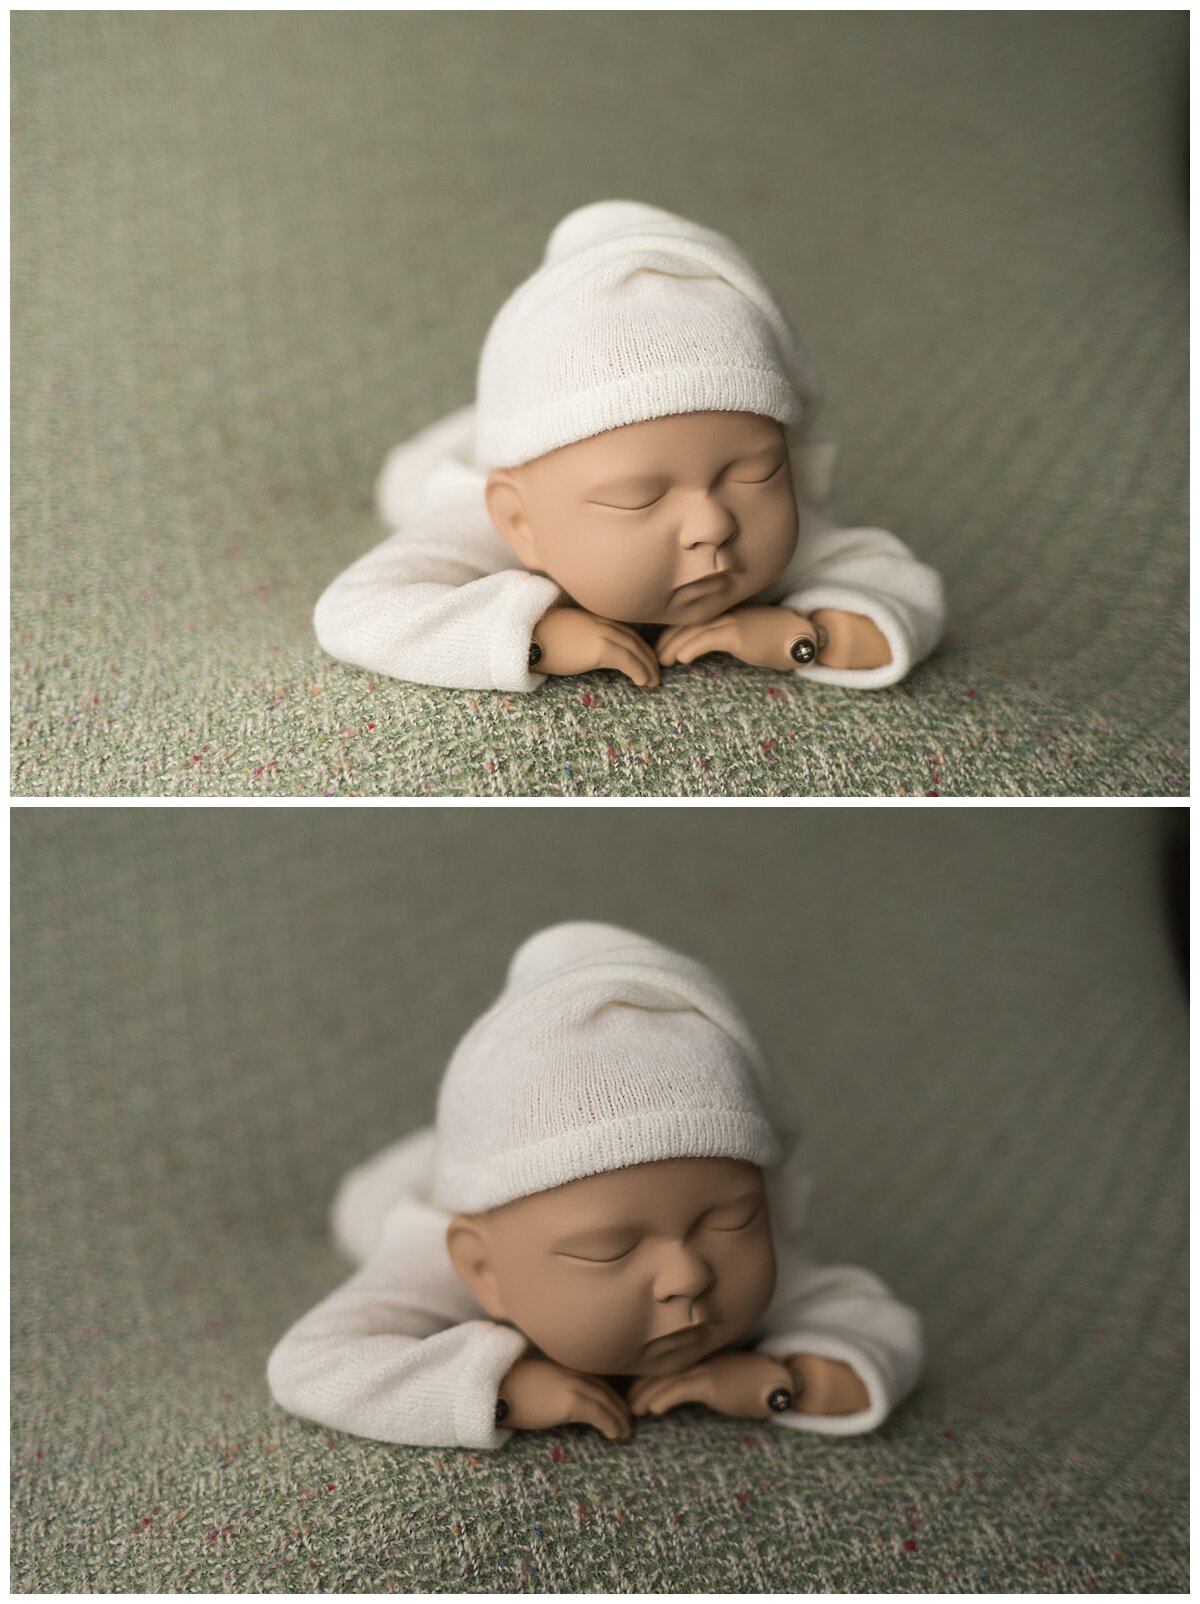
To take it a step further I pulled some random edited samples from my 86” and 64” just to see if I’m drawn to one set over the other (but note I had 2 diffuser panels on to help reduce highlights…me as my science teacher would be scolding me right now for having too many variables😳). Can you guess which group was shot with the 64” and which with the 86”?
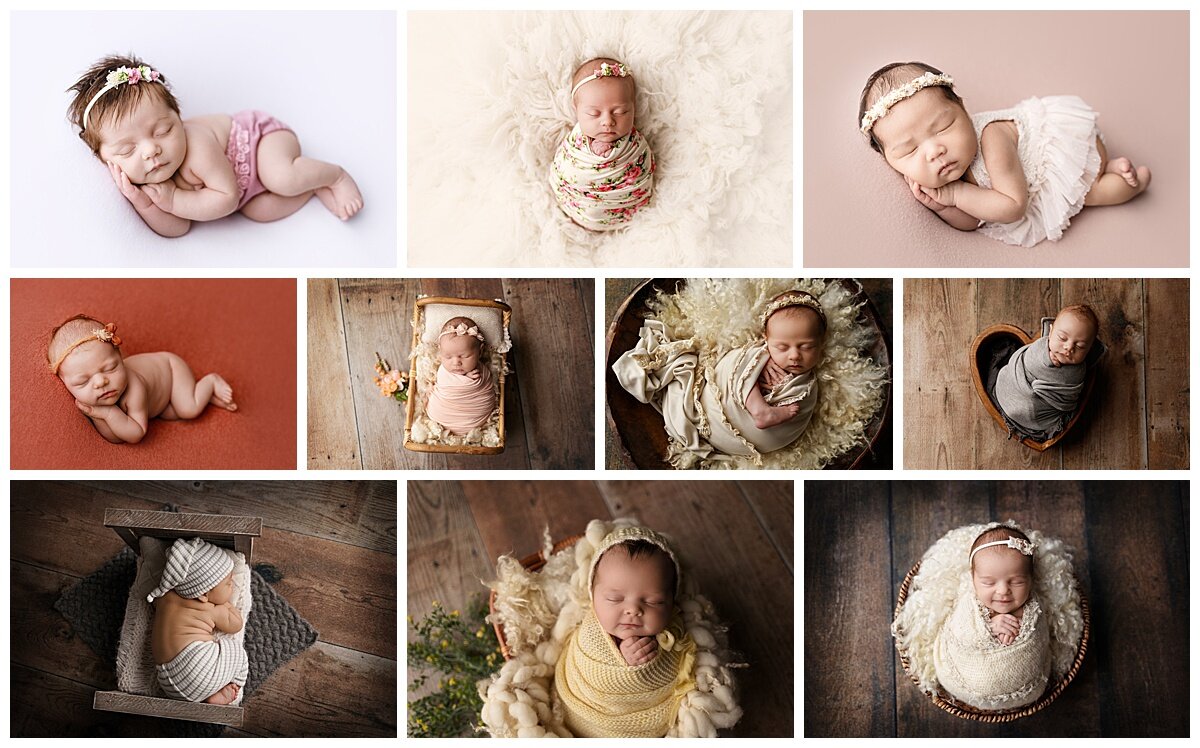
Even knowing which is which, I don’t really see a HUGE difference. I do believe the grouping on the right is a bit brighter, with some extra hot highlights, and not as much contrast. And that is the group shot with the 86”.
So in conclusion, if you prefer brighter and softer lighting, you should consider the 86” PLM. If you like your images a bit more contrasty/shadowy, the 64” will be perfect. But know that with either one you can easily edit your photos to get the look that you like. I prefer the group on the left with less hot highlights, more shadows and more contrast and I really prefer the smaller size of the umbrella, so I have concluded that I’m going to stick with my 64” PLM for now. YAY for more space in the studio!
Has this information helped you? Do you already use one or the other? Do you have issues with blown highlights or too much contrast? Let me know in the comments below which one you are using or which one you think you prefer. I’d love to hear your thoughts!
Have you joined my new Facebook Group yet? Well you should! It’s a free mentoring group for new(er) newborn and baby photographers looking to start and/or grow your businesses. I’ll be doing live videos, sharing tutorials, and starting some great conversations. Be one of the founding members, click below and go join!
If you’ve been struggling with your lighting, posing, angles, etc., check out my virtual and in-person mentoring options.